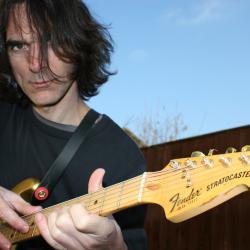
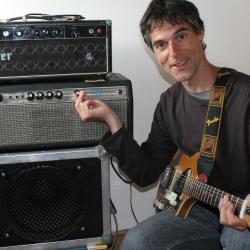
Guitar Lesson: Slide Guitar for Beginners

For this article a few short tips on how to improve your slide playing.
Check out the video,  most of what I will mention here is featured in the video as well.

  What kind of Slide?

There are glass, bronze and metal slides. All of these do give you a different tone. Experiment with various ones to see which ones you like best. Slides also come in various sizes, same here, experiment to see which size you like best of all.

What finger should I use for wearing the Slide?

Wearing a Slide on your pink will leave your ring, middle and index finger free for playing. Using the Slide in this way will leave your other three fingers free for playing chords, riffs and other melodic ideas to enhance your Slide playing.

Position of fingers fetting hand:

Once you start using a Slide, keep your other fingers at all times muting the strings behind the Slide, doing so will give you a cleaner sound, it will also make your Slide notes sound fuller. Slide playing is all about getting a good tone, work on this and be as precise as you can during your practise sessions.

Using Your Fingers:

Play finger style as much as you can when you use a Slide, use only a plectrum when you must. If you do not yet use finger style it may be an idea to get some finger style playing underneath your belt. Check out some of the Slide guitar masters, most of them play using finger style as it tends to work better in combination with the Slide tonewise.

Getting Started with Easy Chord Shapes:

The “A” chord shape may be the easiest to start out with for your Slide playing. I do give you some playing examples in the video, try them to see if they work for you. Some of the most well-known Slide classics also use this chord shape, have a listen and check out some of those songs to see if your recognise the sound.

Once you have some basic Slide technique underneath your fingers work on creating your own Slide style.
One idea may be to play whatever you like without using the Slide and then try to incorporate the Slide into some of these musical ideas.

If you enjoyed this Slide lesson, why not subscribe to the channel? Please do not forget to like and share the video. Thanks!!
Eddie

Tips for Beginners How to Learn the Fretboard

20131102154731eddieA typical question beginners often ask: “Do you really have to know the whole fretboard?” or they will make a remark like: “I first need to know all the notes on the fretboard before I can move on to improve my playing”  Let me answer some of these questions by giving you some tips on what to do and what not when it comes to learning the fretboard:

First of all: You do not need to know all the notes of the fretboard to be able to play the guitar in a creative way. Knowing the notes will not harm with you creative playing but it is not a must to first learn all the notes and then to play music.  We do not learn to speak our mother tongue by first studying literature and grammar of the English language. You learn to speak as you go along, and your language skills will improve the more your practise the language. Same thing with music: You get better by playing. Setting goals for yourself will speed up the learning process and getting to know the notes of the fretboard could be one of those goals.

  Low E and A String:

Make a habit of getting to know the notes on the low E and A string. Most of this can be done by getting to know the Root notes of some of the chords you play: Get to know where the G is in an open G chord, The E in an open E chord, the A in an open A chord etc.
You will find once you get to know the notes on the low E and A, the other strings will follow: The notes of the high E string are the same as the ones on the low E, only three strings left to learn!

Playing Riffs and Melodies in Different Positions:

Play all your favourite riffs and melodies in various positions. This will help your technique and knowledge of the fretboard. It is a fun way to learn as well, since you are playing material you already know.

Sight Reading Using Tutor Books:

Most tutor books will start in the open position. Once you are familiar with the notes in this area move the melodies from the book up into another area of the fretboard. Try to play the melodies in as many positions as you can. Once you get comfortable doing this you will start to see the logic of how the fretboard works.

Keep working at it and hope to catch you soon again,
Eddie

Rhythm Guitar Tips

20140222153811IMG_5187For this article a handful of tips of how to handle playing rhythm guitar in various musical set-ups.

  Playing Guitar in a Duo Set-Up:

In this scenario there could be two guitars, a bass and a guitar, one guitar and vocals, keyboards and one guitar etc.
In a case of Bass and Guitar the guitar will need to carry the rhythm and the song as much as possible since the guitar is the only chord instrument. It is important to play the rhythm and the chords as clear as possible. If you are inexperienced guitar player do set yourself the task to get your rhythm playing as strong as possible. Being able to carry a song on your own will put you into a better position to play with other musicians.
In a case of two guitars in a duo set-up you can be a little more creative with your playing since there are two guitars to carry the rhythm. It is possible to embellish the chords with various riffs and melodic ideas to create a larger musical palette.
A set-up of keyboards and one guitar can be tricky: Keyboards have a large range and as a guitar player you need to check where the keyboard player plays his/her chords.  Try to get an equal balance in the sound without having too much bass or high end. Playing chords on the top E, B and G string may be a good idea as this will give the keyboards more room in the low and mid range.

  Playing Guitar in a Trio Set-Up:

This could be simply Bass, Drums and One Guitar, or it could be Keyboards, Bass and Guitar, or Two Guitars and one Bass.
If you are the only guitar player there is a lot of room to play whatever is needed. It helps to mix rhythm playing with some single string playing since it will break up the monotony of the chords.
Whenever you play with a Bass player, it does help to keep those bottom E and A free for the Bass, try to play your chords using your inner strings and the top three strings. Keeping the music clear and uncluttered is a good idea.

Playing Guitar in a Quartet Set-Up:

This could be: Two guitars, Bass and Drums.
Whenever you are playing in a Two Guitar set-up try to see the rhythm guitar as one: Divide rhythm roles between the two guitar players, when you do it right it can create a large sound where one may not be able to tell who plays what. Most of the Rolling Stones music is like that, especially the songs from the period when Ronnie Wood joined the Stones: Keith and Ron can swap roles easily and they are also good at playing each others parts, which is a good skill to aim for.

  Conclusion:

I have only given you here a few typical set-up examples and how you can to deal the rhythm guitar in that particular set-up. The bottom line is: Keep thinking what you do, whatever the musical set-up your are in. Try to avoid going on auto pilot since the music may suffer as a result.

have fun and hope to catch you soon again,
Eddie

Boss CE-1 Chorus Ensemble and Clones

20130926135626IMG_4407_orginalBoss’s mission has always been: Give musicians access to sounds,  normally available in the studio, in a compact effects unit.
The first effect processors Boss produced were not like the compact pedals we know today, they looked like this one here:
http://www.unaudio.com/media/assetlibrary/
Among the first three effect pedals they made in the late 70s the CE-1 Chorus Ensemble was one of them.
Its sound is based on the Chorus found in a Roland Jazz Chorus amp. In a way this Chorus sound is one of the best Chorus sounds we have available today: The CE-1 sounds lush and feels like it is part of your amp instead of playing through a separate Effects unit.

Like most of the effects from the 70s the CE-1 does have an input control for your signal, which makes it like a proper preamp. Do not expect that you can overload your amp here to get some nice over-driven sounds because the distortion you get is hard clipped and sounds far from nice. There are some other pedals from the same period which will let you do this and you can get some nice, unexpected,  over driven sounds out of them.

Back to the CE-1: It is a pedal which gives you chorus and vibrato. When I say vibrato it should really read tremolo. The Chorus will go up in speed and intensity when you rotate its control. There is a LED light which lights up at the tempo of the chorus unit. You do have the option to select either Chorus or Vibrato. The Vibrato sound takes off when the Chorus leaves: It can go much faster.

The sound of the CE-1 has been used in many pedal which try to clone the CE-1: Most pedals will compromise on the options—-they will give you chorus and when you go up with the RATE control the sound will go into Vibrato— Boss CE-2 is a prime example of that idea. Unlike the CE-1 most of the clones which fall in this category will not let you switch between Chorus and Vibrato sound: You will get the different sounds by changing the controls. The DOD FX 80 Stereo Chorus is a similar pedal, the pedals can be seen as a straight clone of the CE-2 rather than the CE-1, even its colour is similar.

There are also some clone Chorus pedals which will only give you chorus, and when you max out the controls you will get that seasick sound. The Coron CS-1 is one of those chorus pedals, this one comes even will an LED which works on a similar basis as the LED found on the  CE-1. Another pedal in this category is the Rockson  Ch. Chorus pedal: Only chorus sounds here, but both the Rockson and the Coron do sound great, and both these pedals are far more compact that the CE-1.

Happy Playing and hope to catch you soon again,
Eddie

Comparing Boss PW-2 with Electro Harmonix Big Muff

20131021140024eddieThe Electro Harmonix Big Muff is a classic distortion pedal which carries that characteristic Fuzz tone. It’s tone control is unique and can give you many different sounds from dark, muddy bass to bright and trebly sounds and everything in between. Its sustain control gives you unique overtones which gives you the idea you hear a tone above the one you are playing. So far the facts about the well-known Big Muff, now over to a lesser known fact:

Boss’s Power Driver (PW-2) is loosely based on the sound of the Big Muff: It does have two tone controls: one for bass and one for mids, the Drive controls acts like the sustain on the Electro Harmonix. Keeping both the Bass, Mid and Drive  control down you get a similar sound as on the Big Muff: It sounds less wed and sounds almost like a regular distortion pedal. Opening up the Drive makes the pedal sound fuller and bigger, but it also exaggerates your sound, similar as with the Electro Harmonix. The Bass and Mid controls are called FAT and MUSCLE respectively.

On the plus side: The Power Driver is smaller than the Big Muff, may be easier to fit on the average sized pedal board.
The Power Driver does have a lot of bass when you open up the FAT control, this may sound similar to one of those Russian Big Muffs from the 90s.
Again, as said before, the PW-2 is loosely based on the sound of the Big Muff, comparing them side by side the Electro Harmonix does sound fuller and more organic compared to the smaller PW-2.

There are about nine different versions of the Big Muff, I used a recent version for my tests.
Check both pedals out if you get a change, they both sound good and will keep you playing for hours.

Happy playing and hope to catch you soon again,
Eddie

Guitar Lesson: Use Two Handed Fret Tapping to Create Chord Sequences

20131215184822eddie 2For this article a few tips on how you can incorporate two handed fret tapping to outline your chord sequences.
Two handed fret tapping is simply the idea of using the fingers of both your fretting hand and strumming hand to create a larger span on intervals to get your music across.
Two handed tapping became popular in the late 70s and 1980s, but is has been around for much longer but never gained the popularity as it did during that period.
One of the hardest parts of this technique is to incorporate the technique into your own guitar playing without it sounding like a gimmick. One of such a use is the one I want to introduce you here today: Use two Handed tapping to outline chord shapes and sequences.

It is a must that you see your chord shapes in various places across the fret board, especially when you play at higher speeds.
Tapping does not have to be played at super high speed, but yes, you do need to play a bit quicker for the notes to ring. When you play very slowly the notes will die out quickly, because a fretted note on the guitar does not have the sustain as a note being played on the Trumpet!.

One idea you can use is to start your chords on the Root note: use your fretting hand to play the Root note, then add other notes of the chord with the rest of your finger of your fretting hand and strumming hand. Create a little rhythmic idea for the notes to make sense.

You can record a chord sequence using one strum per chord then play the tapping over the top of your recording. Use the tapping to outline the chords you recorded before.

Once you can outline the chords try to add a little melodic motif along the chords. You do not need to tap the same pattern over and over again, make variations based on rhythm and harmony.

Once you get the hang of this technique you will start to discover more and more and how you can use this technique into your own playing.

Have fun and hope to catch you soon again,
Eddie

Guitar Lesson: Learn to Use C-Chord shape as moveable chord shape

20131228140041IMG_2980Most beginners get introduced to open chord shapes right in the beginning. Open chord shapes do share a combination of fretted- and open string notes. Most of these open chord shapes can be used as moveable chord shapes. Sometimes these chords are being referred to as barre chords.
For this article I want to introduce you to the some chords which use the open C shape. The shape of the chord is similar as the well-known C chord, but some of these chords will be fretted higher up the fret board to create other type of chords.

Here is the open C chord again, which uses two open strings and three fretted notes
E –0———-
B –1———–
G –0———-
D –2———-
A –3———-
E ————-

Now try this chord here which is an E chord, using the open C chord shape to create its sound:

E——4—–
B —–5—–
G —–4—-
D —–6—-
A —–7—-
E ———-

How do you know this chord is called an E chord? By looking at where the Root notes are: On the open C chord the Root is on the  A and B string, for the chord above this is similar, there is no change to how the notes are being grouped: There is an E note on the 7th fret of the A string and an E note on the 5th fret of the B string. Remembering where the Root note are in the chord shape is a useful tool to identify which chord you are playing.

Here is another one, this time it is a G chord with its Root on the  A string 12th fret and B string 8th fret:

E —–7—
B —–8—
G —–7—
D —–9–
A —–10–
E ———

Which fingers do you use to play the moveable C shape chord? You can barre your first finger for the notes found on the high E and G string: Both these notes are on the same fret number, therefore it makes sense to create a little barre using your first finger. For the rest of the chord, play it like how you would play and open C chord with the difference that you use your pink for the note found on the A string.

What is good about using moveable C shape chords? They sound bright and sound clearer compared to moveable chords of the E-and A-type.
You can move your fingers up along the fret board to create different types of chords, great!

Try to use to moveable C chord as much as you can to get the shape into your finger, and ears.

Hope to catch you soon again for some more guitar inspiration.
Eddie

Beginners and Moving Out of Playing in Open Position

20140222153811IMG_5187Most beginners will learn to play the guitar using the open position. They will combine using open strings combined with the use of some fretted notes.

Playing in the open position is fine but it may not be the easiest position to play in: Your wrist is at an angle no matter what you do, an easier position for the guitar is the fifth position.
Now how do you go from playing in the open position to playing in the fifth position? Try to find the same notes you already play, and find those notes in the fifth position and just play. Look at the angle of your wrist when you use the fifth position: You will notice your wrist will looks straight compared to how it was when you play in the open position.

An easy and enjoyable way to  play higher up the fretboard is  to play simple riffs you already play in the open position,  simply move them up and play. Start playing one note in the open position and find the same note higher up the fretboard, carry on with this until you have covered all the notes for your riff and just play the riff now in the higher position. One way to remember the position of your fingers is to write the riff down in tab using the fretnumbers of the higher position. Once you have written down the riff, play the riff several times and try to remember the  fingering. Once you can play a few riffs higher up the fretboard you will start to see where the notes are located compared to the notes in the open position.

Chords what about chords? Good question! Well, you will need to use different chord shapes which will work in the higher position. Start using barre chords, if you are new to them learn one barre chord shape and try to move this shape along the fretboard. Using some barre chord shapes will improve your playing and your chord knowledge.

Good luck and hope to catch you soon again.
Eddie

Better Sound from Your Guitar Amp? Turn Volume Up!!

20140314141252IMG_4368Simple idea really but  maybe not always practical for you to do? For this article a handful of ideas of how you can manipulate the volume of your amp to get a better sound.

We all know the tales of “Turn Up all Your Controls to 10 and Just Go” Try this is a small room and you know how long you can stand that sound and how well you play. So is there some truth in the myth or is it all nonsense really?

Turning up any guitar amp will make them sound better, the sound becomes clearer and what you really notice is the bass response: Bass needs a bit more power to be heard (and felt) This is why bass speakers tend to be bigger compared to the average guitar speaker.

Before you turn your amp up have a look at where you play: Do you play in a small room? A larger hall or………? The room helps to amplify your sound, try to work with it: There are the acoustics of the room, a room which is full of echo will not sound good when you play too loud. It is better to kill some of the echo or simply turn your volume down.

If you are playing regular gigs you may have noticed that your guitar sound is different on each night. What is this? The room where you play and whatever else goes on. Ideally you should adjust your guitar sound to where ever you play, not doing so may give you an unpleasant playing experience.

Okay back to the amp and volume: A simple thing to do is, just turn amp half way, or just over and play. If the sound is too loud, just turn the volume down on the guitar. Turning volume down on guitar will end up in loss of brightness. The loss of brightness may not be a problem if you do not like it try another way:

Use a pedal like a graphic EQ, a booster or a simple distortion pedal, or a compressor. Most of these pedals will have a volume control, use the volume control to set the level to where you like it. Hopefully you can use your pedal to control only the volume without using its effect. EQ’s and compressors are good at any of this, but boosters may also be fine.

Get into the habit of setting your guitar volume a bit louder than what you really need and get used to its sound, go back from time to time to setting the amp at lower volumes and compare its sound.
By setting the amp at higher volumes you may gets some hiss, but do not be put off by any of this, the hiss will only be noticeable when you stop playing.

Enjoy your playing and hope to catch you soon for more updates,
Eddie

Using Multi Effects Units For Your Guitar Playing

20131021140024eddieFor this article a few high lights about using multi effect guitar units. I will not provide a shopping list for which unit to get or what is the best available processor around. Will mention some of my own experience with regards to multi effect units.

The first popular multi effects started to appear during the mid  1980s, the early ones used to be large in comparison to most of today’s units. Once the first multi effectors came out people ditched their compact pedals. Who will ever need them again eh? Well by the early 90s things changed again, and single compact effects were back and today we live in a world where guitarists use whatever they like.

What is there to like about a multi effect processor? Why is a good idea to use one? What about their sound compared to a single compact pedal? Are they easy to use?
All very good questions and there is a lot to say about each question. Most of the answers will depend on whatever unit you use as they all differ in sound and how easy they are to use.

Most beginning guitarists today will get introduced to effects by their guitar amps: Most of today’s amps do come with a handful of effects. These effects are often limited in tweak ability, they are good to give you and idea of what a particular effect will sound like. A multi effector can be viewed in a similar way: They are a great way to access many different effects coming all from one unit. They will give you an idea what each effect will sound like and how you can combine certain effects to create a unique sound.

Okay let us have a closer look at a typical multi-effector: Most of them will come with pre set sounds and the ability to modify- and store any of those pre set sounds. When you go through some of the sounds you will find that some of those sounds are really over the top: Impressive to hear but not really usable to play with. You will also find some signature sounds of well-known guitar players. Again, most of those sounds you will recognise, but they may not be that usable for your own playing.

When you analyse the individual sounds from any of the pre set sounds you will find  that most of those sounds are created out of a combination of effects. This is a typical for multi effectors as they get their sound from the combination of certain effects. Try to modify one effect and you will often find out that you will need to add other effects to this single effect to get a good, usable sound.
All in all this is good, as it shows you how sounds are being created.

How good are the sounds in multi-effectors compared to single compact pedals? Maybe you should not ask. One of the reasons to use multi effectors is to be able to create unique, individual sounds which you may not be able to get from a single compact guitar effects pedal.
If you are really fond of delay sounds it may still be easier to get a single delay unit and get your sounds from there. View a multi effector as a sound generator rather than something you use for one particular sound.

Over the years multi effectors have become easier to use. Some of the Boss ones feel almost like you are using a handful of their single compact pedals in sound and ease. Very good and impressive indeed.

A big advantage of why to use a multi effector must be to have a lot of sounds available from one unit: Very useful for gigs and studio work. It saves time patching around pedals and you can also store your own, individual sounds. Out of all the sounds you get you may have about 10 sounds you really like, and those 10 may be very usable for your own playing.

Once you use a multi effector, why not combine some of the sounds with any of the single compact pedals you already use in your set-up? This will give you even more power to tweak your own sounds.

Once you have created a few, unique sounds do not use these sounds all the time as they will loose their uniqueness. Use the sounds from time to time to keep things fresh.

Enjoy your sound adventures and hope to see you soon again for more updates,
Eddie